Picture your bird hopping around with confidence, perching without any trouble, and playing without getting their talons snagged on your favourite jumper. Using a bird nail trimmer is one of those simple acts of care that makes a huge difference to their daily comfort and long-term health.
Why Regular Nail Trims Matter for Your Bird
For our companion birds here in Australia, life is a world away from their wild cousins who are constantly wearing down their nails on rough bark and uneven terrain. Without that natural, everyday filing, a pet bird's nails can get overgrown in a flash, leading to some pretty serious health issues down the line.
Think of this guide as your go-to resource for making nail trims a calm, safe, and positive part of your routine. We'll cover everything from picking the right tools to understanding your bird's foot anatomy, giving you the confidence you need to keep those talons in top shape.
The Risks of Overgrown Nails
When a bird’s nails grow too long, they can set off a chain reaction of problems that really mess with their mobility and overall health. It’s a small issue that can balloon into a big complication if it’s ignored.
- Painful Foot Conditions: Long nails can force a bird's toe to twist into an unnatural position. This leads to discomfort, pressure sores, and can even cause arthritis over time.
- Difficulty Walking and Perching: Overgrown talons make it tough for a bird to get a secure grip on perches, which often leads to instability and potential falls.
- Increased Risk of Injury: Those long, sharp nails are far more likely to get caught on toys, cage bars, or fabric. A snag can easily cause a torn nail or even a broken toe.
The Growing Importance of Pet Grooming
This focus on preventative health is something we're seeing right across Australia. The pet grooming market is absolutely booming as owners realise that wellness is about more than just food and a cage. Globally, the pet grooming products market is forecast to hit USD 30.3 billion by 2034, and Aussie markets are seeing some serious momentum—especially as urban growth in places like Queensland boosts pet ownership. This shift shows a growing understanding among Aussie bird owners that proper nail care is a critical part of keeping their pets healthy.
Expert Tip: A good rule of thumb from avian specialists is to check your bird’s nails monthly. If you can hear their nails clicking on a hard surface or you see them starting to curve too much, it's definitely time for a trim.
By making regular nail maintenance part of your routine, you’re not just grooming; you're actively preventing pain and giving your bird a better quality of life. For more foundational knowledge, our essential guide to caring for pet birds is a great place to build your confidence.
How to Choose the Right Bird Nail Trimmer
Picking the right tool for a nail trim can be the difference between a calm, quick snip and a stressful wrestling match with your feathered mate. Think of it like a chef picking the perfect knife—you need the right tool for the job. It's less about finding the one "best" trimmer and more about finding the one that suits your bird's size and your own confidence level.
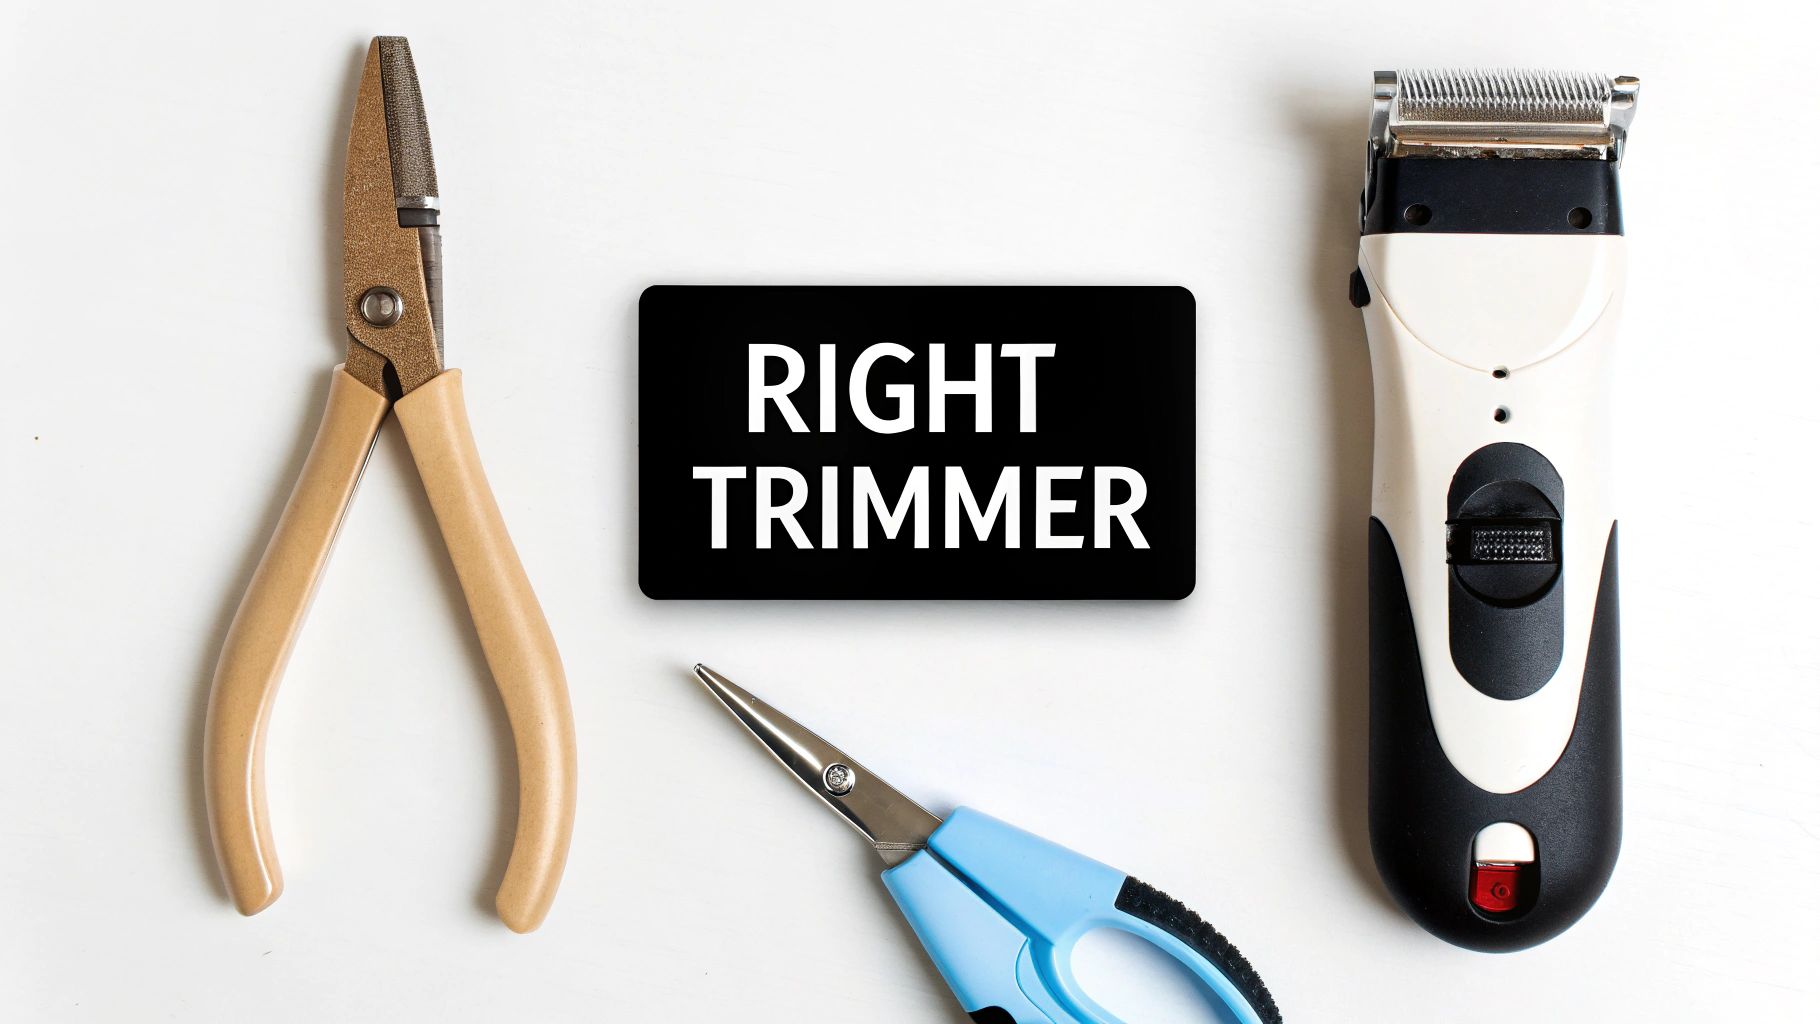
For bird owners here in Australia, there are a few solid options on the market, each with its own perks and pitfalls. Let's break down the different types so you can make a smart choice for your bird. A quick tip: a bird happily distracted with some engaging toys, like a colourful Activity Wall Box, can make the whole grooming experience a lot easier on everyone.
Matching the Trimmer to Your Bird's Size
The absolute first thing to consider is your bird's size. A heavy-duty trimmer built for a big macaw will be way too clumsy and powerful for a tiny budgie's nail, and a small pair of clippers won't even make a dent in a cockatoo's talons. Using the wrong size is a recipe for accidents, injury, or just a plain bad trim.
- Small Birds (Budgies, Finches, Canaries): These little ones have tiny, delicate nails that need a tool with pinpoint control. Your own nail clippers are often too big and can crush the nail instead of cutting it cleanly.
- Medium Birds (Cockatiels, Conures, Lorikeets): Their nails are a bit thicker and call for something sturdier. The goal here is a clean, sharp cut without causing any splitting.
- Large Birds (Macaws, Cockatoos, Galahs): With their thick, tough nails, these powerful parrots need a heavy-duty trimmer that can handle the job safely and get it done in one go.
Comparing Common Trimmer Types
Alright, now that we've got size sorted, let's look at the three main styles of bird nail trimmers you'll come across. They all work a bit differently, and the best one for you often boils down to what feels right in your hand.
Expert Insight: Many experienced avian vets in Australia suggest starting with scissor-style clippers for smaller birds because they offer fantastic control. For the bigger parrots, they often lean towards a guillotine style but always stress how vital it is to have a razor-sharp blade to avoid crushing the nail.
The tool you pick should feel comfortable and steady, giving you the confidence to do the trim calmly and safely. As you browse the different types of parrot supplies available in Australia, you'll start to recognise these distinct categories.
Bird Nail Trimmer Comparison Guide
To help you get a clear picture of your options, here’s a quick side-by-side look at the different trimmer types. This should help you figure out what's best for your bird's size and your own comfort level.
| Trimmer Type | Best For (Bird Size) | Pros | Cons |
|---|---|---|---|
| Scissor-Style Clippers | Small to Medium Birds | Offers excellent visibility and precision. Easy to control the amount of nail being removed. | May not be strong enough for the thick nails of very large parrots. Requires a steady hand. |
| Guillotine-Style Clippers | Medium to Large Birds | Powerful and provides a quick, clean cut. Blade replacement is often possible. | Can be harder to see exactly where you are cutting. A dull blade can crush the nail. |
| Electric Grinders/Filers | All Sizes (especially nervous owners) | Reduces the risk of cutting the quick. Smooths the nail edge, preventing snags. Ideal for dark nails. | The noise and vibration can frighten some birds. Takes longer than clipping. |
At the end of the day, the best bird nail trimmer is simply the one that lets you keep your bird's nails in good shape with the least amount of stress for both of you. Don't be shy about having more than one type on hand—many owners use clippers to take off the length and then a grinder to smooth off the sharp edges.
Understanding Your Bird's Nail Anatomy Safely
Before you even think about picking up a nail trimmer, it’s absolutely crucial to get familiar with what’s going on inside your bird’s nail. Getting this right is the difference between a calm trim and a stressful, painful experience for your feathered friend. Think of it like a map—you wouldn’t start a journey without one, and you shouldn't start trimming without knowing the landscape of the nail.
Inside each nail is a tiny vein and nerve supply called the quick. If you cut into this, it hurts your bird and will cause bleeding. It’s pretty much the same as cutting your own fingernail too far back into the sensitive nail bed. Our goal is to avoid that at all costs.
Identifying the Quick A Crucial First Step
Learning to spot the quick is easily the most important skill for at-home nail trims. How you do it really depends on the colour of your bird’s nails.
-
For Birds with Light-Coloured Nails: This is the easy part. On nails that are white, clear, or a pale colour, you can usually see the quick. It’ll look like a faint pink or reddish line running down the middle, stopping well before the tip.
-
For Birds with Dark or Black Nails: This takes a bit more detective work, since you can't see through the nail. A bright light is your best friend here. The torch on your phone is perfect for the job. Shine it from behind the nail, and it will often glow just enough for you to see the dark shadow of the quick inside.
Defining the Safe Trimming Zone
Once you’ve got a good idea of where the quick ends, you can identify the safe part to trim. This is just the very tip of the nail, which is made of dead keratin—just like the white part of our own fingernails. It has no feeling, so trimming it is completely painless.
Expert Avian Advice: Vets across Australia all agree: it’s always better to take off less than you think you need to. The golden rule is to trim only tiny slivers off the end at a time. After each little snip, have a look at the cut surface. If you see a small dark dot starting to appear in the centre, stop immediately. That’s the very start of the quick.
This careful, slice-by-slice method is your best defence against causing pain or drawing blood. It might take a few extra minutes, but the trust you build with your bird is worth every second. You can also use different types of perches designed for birds in their cage to help wear down nails naturally, which can mean fewer trims are needed.
Your 'Plan B' What to Do if You Nick the Quick
Even the most experienced bird owners can have an off day, and accidents happen. The key is not to panic, but to be prepared.
Having styptic powder or a styptic pencil on hand is non-negotiable for anyone trimming nails at home. This powder is a special clotting agent that stops minor bleeding almost instantly and safely. Just dip the bleeding nail tip directly into the powder. If you're ever caught without it, cornflour or even plain flour from the pantry can help in a pinch, but styptic powder is the most reliable tool for the job. Being prepared gives you the confidence to handle the trim calmly, knowing you have a safety net if you need it.
A Step-by-Step Guide to a Calm Nail Trim
Turning a nail trim from a dreaded chore into a calm, routine moment is all about preparation, patience, and positive reinforcement. This guide breaks the process down into small, achievable steps, helping you build both confidence and a stronger bond with your bird. The aim isn't just to get the job done, but to make it a positive experience for you both.
First things first, get your setup ready. Choose a quiet, well-lit room where you won't be disturbed. Gather everything you'll need before you even get your bird out.
- Your chosen bird nail trimmer, cleaned and sharp.
- Styptic powder or cornflour, with the lid already open and within easy reach.
- A clean, lightweight towel.
- A special treat your bird absolutely adores.
Having it all laid out means you can focus entirely on your bird without fumbling for supplies, which is key to keeping the whole vibe calm and controlled.
The Gentle Hold
How you hold your bird is crucial for keeping them secure and minimising stress. For most birds, especially those not used to a lot of handling, the "towel technique" is what avian vets right across Australia recommend. It helps them feel secure without putting any pressure on their delicate chest, which could restrict their breathing.
Gently wrap the towel around your bird, covering their head and wings. This simple step reduces visual stress and stops them from flapping. Hold them securely but gently, making sure their body is supported in your hand. This isn't about force; it's about creating a safe, snug space where they feel contained and less vulnerable.
This diagram shows you exactly where it's safe to trim, taking the guesswork out of it.
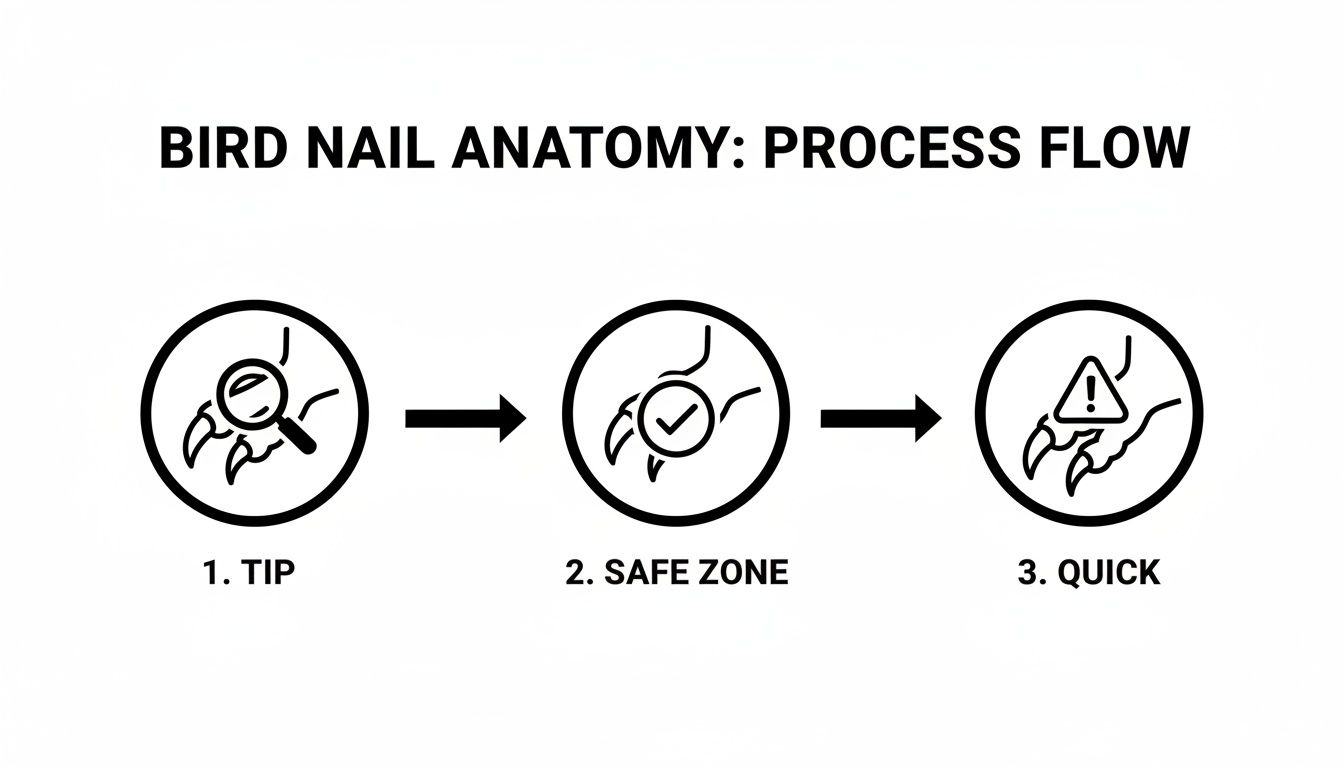
As you can see, the "Safe Zone" is right at the tip, well away from the sensitive "Quick" to prevent any accidents.
The Golden Rule of Trimming
Alright, now for the main event. Isolate one toe at a time, gently extending it from the towel. The single most important piece of advice you'll ever get is this: trim only tiny slivers at a time. This is absolutely not a race.
- Find the Quick: Use what you know about your bird's nail anatomy to spot the quick. If their nails are dark, a bright torch held against the nail can help you see it.
- Make the First Snip: Trim just the very sharp, pointed tip of the nail.
- Check Your Work: After each tiny snip, look at the cut surface. If it's all white or a uniform colour, you're still in the safe zone.
- Know When to Stop: If you see a small, dark dot appear in the centre of the cut surface, stop immediately. That's the beginning of the quick, and another cut will cause pain and bleeding.
It is always, without a doubt, better to leave a nail a fraction too long than to risk cutting it too short. The goal is simply to remove the sharp, uncomfortable tip, not to achieve a perfect length in one go.
By taking this slow, methodical approach, you drastically lower the risk of an accident and show your bird that the process is gentle and painless. And remember, the right perches can do a lot of the work for you by naturally wearing down nails. You can learn more about choosing the perfect bird perch stand to help with maintenance.
Ending on a High Note
How you finish the trim is just as important as how you start. You want your bird to connect the experience with something good, not just feel relief that it’s over.
Once you’re done, gently release your bird and immediately offer some calm, quiet praise. Give them that favourite treat—the special one they don't get every day. This immediate reward is powerful and helps build a positive association.
By ending the session with praise and food, you’re not just trimming nails; you’re strengthening your bond and teaching your bird that handling can lead to wonderful things. It transforms the whole experience into a moment of shared trust.
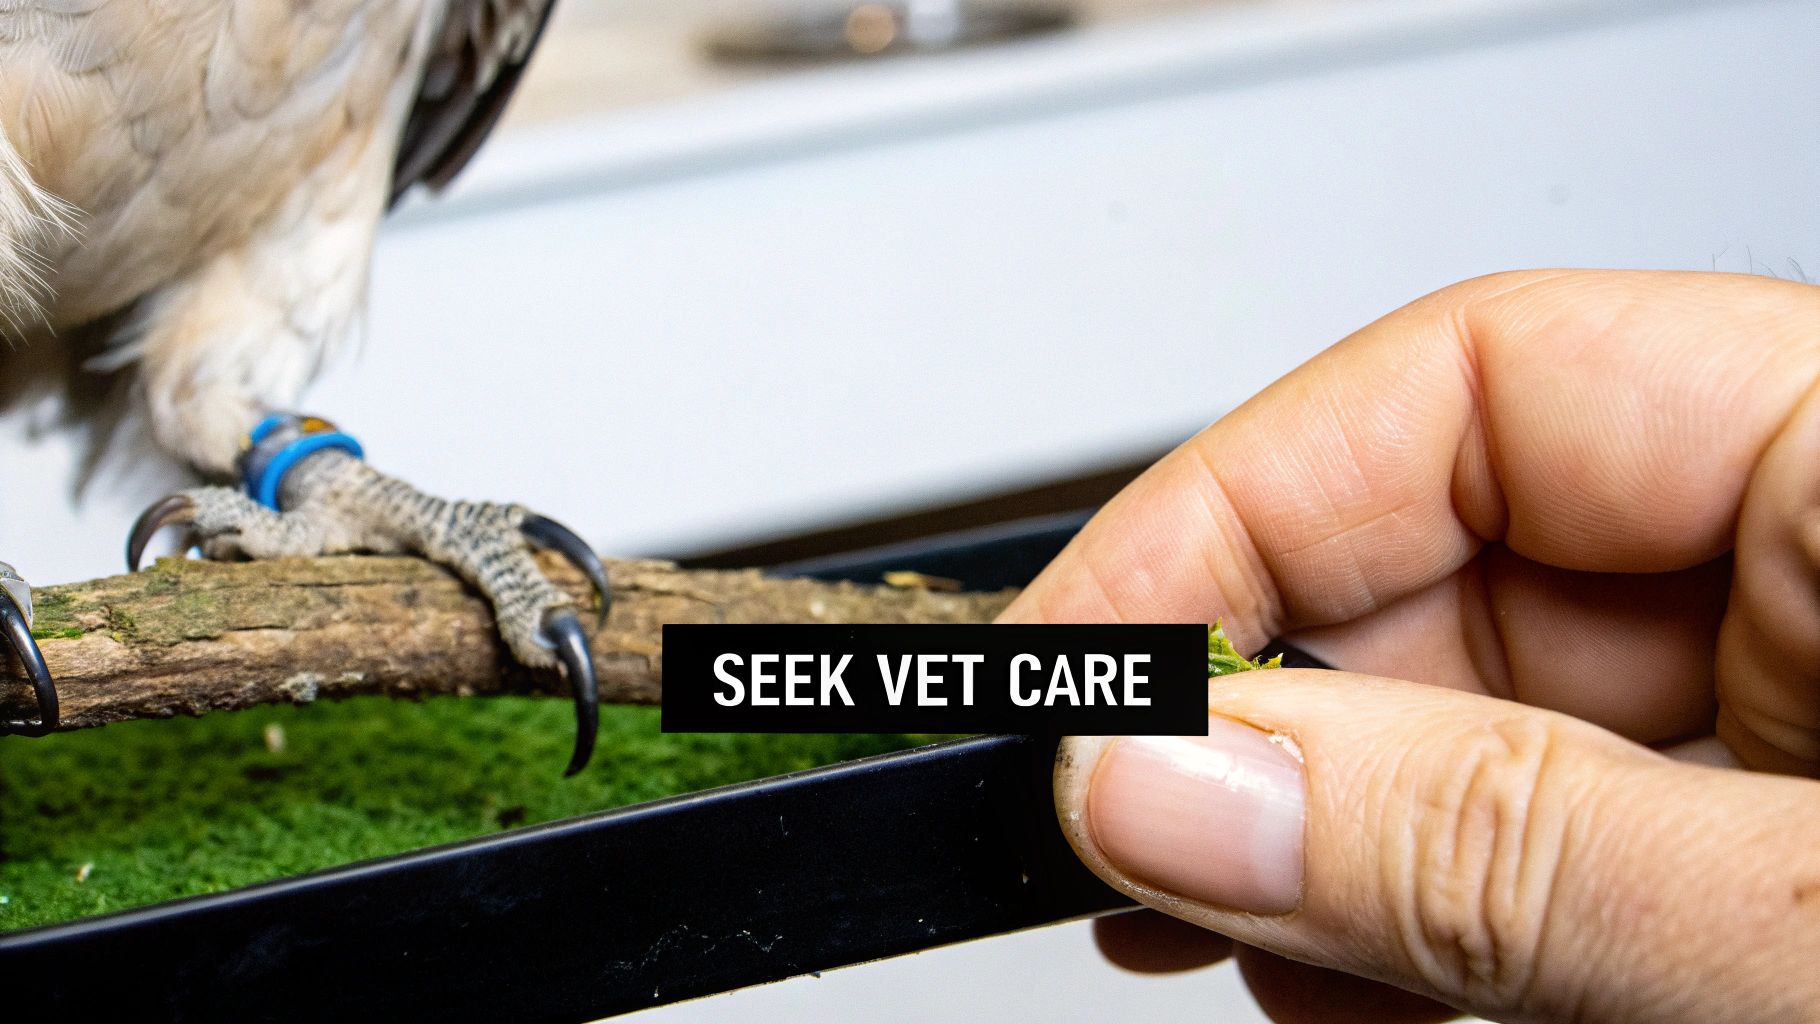
Alternatives to Trimming and When to Call a Pro
What if the whole idea of clipping your bird's nails fills you with dread? That’s completely normal, and it's perfectly okay. Your confidence and your bird’s comfort are what matter most, and forcing a stressful situation isn't going to help anyone. Thankfully, there are some great alternatives to make sure your bird's talons stay healthy without you having to do the trimming yourself.
For a lot of bird owners across Australia, the best and safest option is simply to get a professional to do it. Your local avian vet or a specialist bird groomer has the experience, the right tools, and the gentle handling techniques to get the job done quickly and safely. They can turn what might be a tense moment at home into a routine, stress-free event for your bird.
When to Seek Professional Grooming
Knowing when to hand the task over to someone else is the sign of a responsible and caring bird owner. It's always better to call in a professional if you find yourself in any of these situations:
- You're Not Confident: If you feel nervous, your bird will pick up on that anxiety instantly. A professional’s calm, steady hand makes a world of difference.
- Your Bird is Extremely Fearful or Aggressive: A vet knows how to safely handle birds that resist grooming, keeping both them and you safe from harm.
- You Have a New or Rescue Bird: Let a professional handle the nail trims while you focus on the more important job of building trust and a positive bond.
- Your Bird Has Dark Nails: If you can't confidently see where the quick is, it's much safer to let an expert with a trained eye take over.
During a professional visit, the vet or groomer will use expert restraint techniques, check the nail length, and get the trim done efficiently. It's also a great chance for them to check for any underlying foot health issues at the same time, giving you complete peace of mind.
At-Home Prevention: Conditioning Perches
While professional trims are a fantastic solution, you can also reduce how often they're needed by setting up your bird's cage to encourage natural nail maintenance. This is where conditioning perches come in.
These are special perches with a textured, gritty, or uneven surface. They're designed to gently file down your bird's nails as they walk and climb, much like the rough branches they’d encounter in the wild. Placing a conditioning perch somewhere your bird lands or sits a lot, like near their food bowl, can make a real difference over time.
Expert Avian Vet Advice: Conditioning perches are a brilliant supplement, but they should never be the only type of perch in the cage. Your bird needs a variety of textures and diameters, including natural wood perches, to ensure good foot health and prevent pressure sores or conditions like bumblefoot.
These preventative tools are part of a bigger picture of how much we value our pets' wellbeing. In fact, the global market for pet clippers and trimmers, which includes tools for bird care, was valued at USD 5.41 billion in 2023 and is expected to keep growing. For Australian bird owners, this isn't just a statistic; it shows a real cultural shift toward treating our feathered companions with the best possible care. You can read more about these global pet care trends to see how our approach to pet wellness is evolving.
Combining preventative measures like conditioning perches with professional trims when needed gives you a well-rounded nail care strategy. This approach keeps your bird's talons at a safe, comfortable length without putting unnecessary stress on you or your feathered friend.
Recognising Nail Problems That Need a Vet
Your bird's feet and nails are tiny windows into their overall health. While a good quality bird nail trimmer is a must-have for routine care, it's a tool for maintenance, not for treating serious medical issues. Being a responsible bird owner in Australia means learning to spot the warning signs that need an expert eye.
Sometimes, a nail problem isn't just about length. It can be a symptom of something bigger going on inside. Knowing when to put the trimmers down and call your avian vet is absolutely crucial.
Beyond a Simple Trim
Making a habit of regularly checking your bird’s feet should be part of your routine. You’re looking for any changes from the norm, as these can be early signals that something’s amiss.
- Persistently Overgrown Nails: If your bird’s nails seem to be growing at lightning speed or are always overgrown despite regular trims, it could point to an underlying health problem like liver disease.
- Brittle, Flaky, or Twisted Nails: Healthy nails are smooth and solid. If they’re brittle, flaking apart, or growing in a weird, twisted direction, it might be a sign of nutritional deficiencies.
- Discolouration: Any strange changes in nail colour, such as dark spots or what looks like bruising under the nail (when there's been no injury), should be checked out by a professional.
Serious Foot and Leg Conditions
Looking beyond the nails themselves, the condition of their feet and legs tells an important story. The issues below need immediate veterinary care, not a home grooming session. Understanding what a pet wellness center can offer is invaluable for preventing and addressing these kinds of problems.
Expert Avian Vet Advice: One of the most common and serious foot conditions vets see is pododermatitis, often called bumblefoot. It presents as redness, swelling, sores, or scabs on the bottom of the feet and can be caused by improper perching, obesity, or poor nutrition. It is a painful condition that requires medical treatment.
Swelling in the feet or joints is another major red flag you should never ignore. If you notice any of these signs, don't wait. Getting a proper diagnosis from a qualified avian vet is the only path forward to treat the root cause and get your bird the care they need to thrive. While they're on the mend, distracting them with safe chew toys, like our popular foraging puzzles, can help keep them mentally stimulated.
Still Have Questions About Trimming Your Bird's Nails?
Even with a solid guide, it's natural to have a few lingering questions before you start clipping. Here in Australia, bird owners often run into the same worries, so we've put together answers to the most common ones. Think of this as that extra bit of confidence in your back pocket.
Each answer circles back to the safe, gentle practices we've already covered, making sure you're set up to do what's best for your feathered mate.
How Often Should I Be Trimming My Bird's Nails?
There's no magic number here. Nail growth is a bit different for every bird, depending on their species, age, diet, and just how active they are.
A good rule of thumb is to give their nails a quick check every 4 to 6 weeks. You’ll know it’s time for a trim if you notice:
- Their nails are starting to click on hard surfaces as they walk.
- The tip of the nail is starting to curve quite a bit.
- They're getting snagged on your clothes, their toys, or bits of their cage.
Regular checks are always better than sticking to a rigid calendar.
Can I Just Use My Own Nail Clippers?
This is probably one of the most-asked questions, and the answer from any good avian vet is a firm no. Human clippers are designed to crush down on a flat nail. A bird's nail is round, and using human clippers can easily cause it to split or crack—which is incredibly painful and can lead to a nasty infection.
Expert Advice: Always stick to tools made for the job. Scissor-style or guillotine-style clippers, or even an electric grinder, are all designed to give a clean, sharp cut that minimises any discomfort and risk.
What if My Bird Is Absolutely Terrified of the Trimmer?
A bit of fear is a completely normal reaction, but you can definitely work through it with patience. The trick is to desensitise your bird to the tool itself. Start by just leaving the nail trimmer near their cage for a few days. Let it become a boring, familiar object that isn't a threat.
From there, try holding the trimmer near your bird without actually doing anything, then offer praise and a favourite treat. Slowly build up to just touching the trimmer to a nail for a split second, followed by another reward. This whole process helps swap out that fear for a positive feeling. And once you've had a successful trim, a new and exciting toy like a shreddable pinata makes for a fantastic reward.
For a Nervous Bird, Is It Better to Use Clippers or a Grinder?
For a really anxious bird, an electric grinder can sometimes be the better choice. Yes, the noise and vibration can take a little getting used to, but the gradual filing action gets rid of the sudden 'snap' from clippers that startles so many birds.
Grinders also make it much harder to accidentally hit the quick. That extra layer of safety can be just as calming for a nervous owner as it is for the bird.
Keep Reading
- Perches for Birds
- How to Teach a Bird to Talk
- The Essential Guide to Caring for Pet Birds
Disclaimer Summary: The information in this article is general in nature and may include external links or resources not created by Lou Lou Bells Bird Toys. Every bird is unique, so we encourage you to seek personalised advice from your own veterinarian or avian specialist. For full details, please read our complete disclaimer here.